Styling Protomaps in Leaflet
After creating a local map with Protomaps in the previous post, I wanted to make some changes to the styling of the map. Since I do not want to start from scratch, I use the built-in light theme and start making changes from there. All the styling seems to happen on the JavaScript side, i.e., when your web browser needs to display the map. This enables quick iterating over style changes. Much better than what I remember traditional tile servers being like, they often involved some hard to understand configuration setup and a slow rerendering of tiles you want to view.
For this post, I am assuming you have the leaflet+protomaps setup from that previous post. Note that I did update the map data from the Protomaps world build since then, so the data shown is not exactly the same any more.
What I describe here for styling will not be exhaustive, but maybe it can get you going.
Grabbing the Light Theme
In order to modify the built-in light theme, I first change the creation of the protomaps layer by explicitly telling it what theme to use. Before, I was not specifying this at all, which means Protomaps uses its default light theme.
To be explicit, I change the existing call to protomapsL.leafletLayer to be
as follows.
// Grab hold of the light theme configuration
let light_theme = protomapsL.light;
// Create the actual paint and label rules. These decide how to render the map.
let my_paint_rules = protomapsL.paintRules(light_theme, "");
let my_label_rules = protomapsL.labelRules(light_theme, "");

// Tell Protomaps to create a layer for leaflet
var layer = protomapsL.leafletLayer({
  url: config.file,
  // Pass both rules along
  paint_rules: my_paint_rules,
  label_rules: my_label_rules,
});
The paint_rules specify colours, width, and similar things for features. The
label_rules have to do with how text is shown on the map.
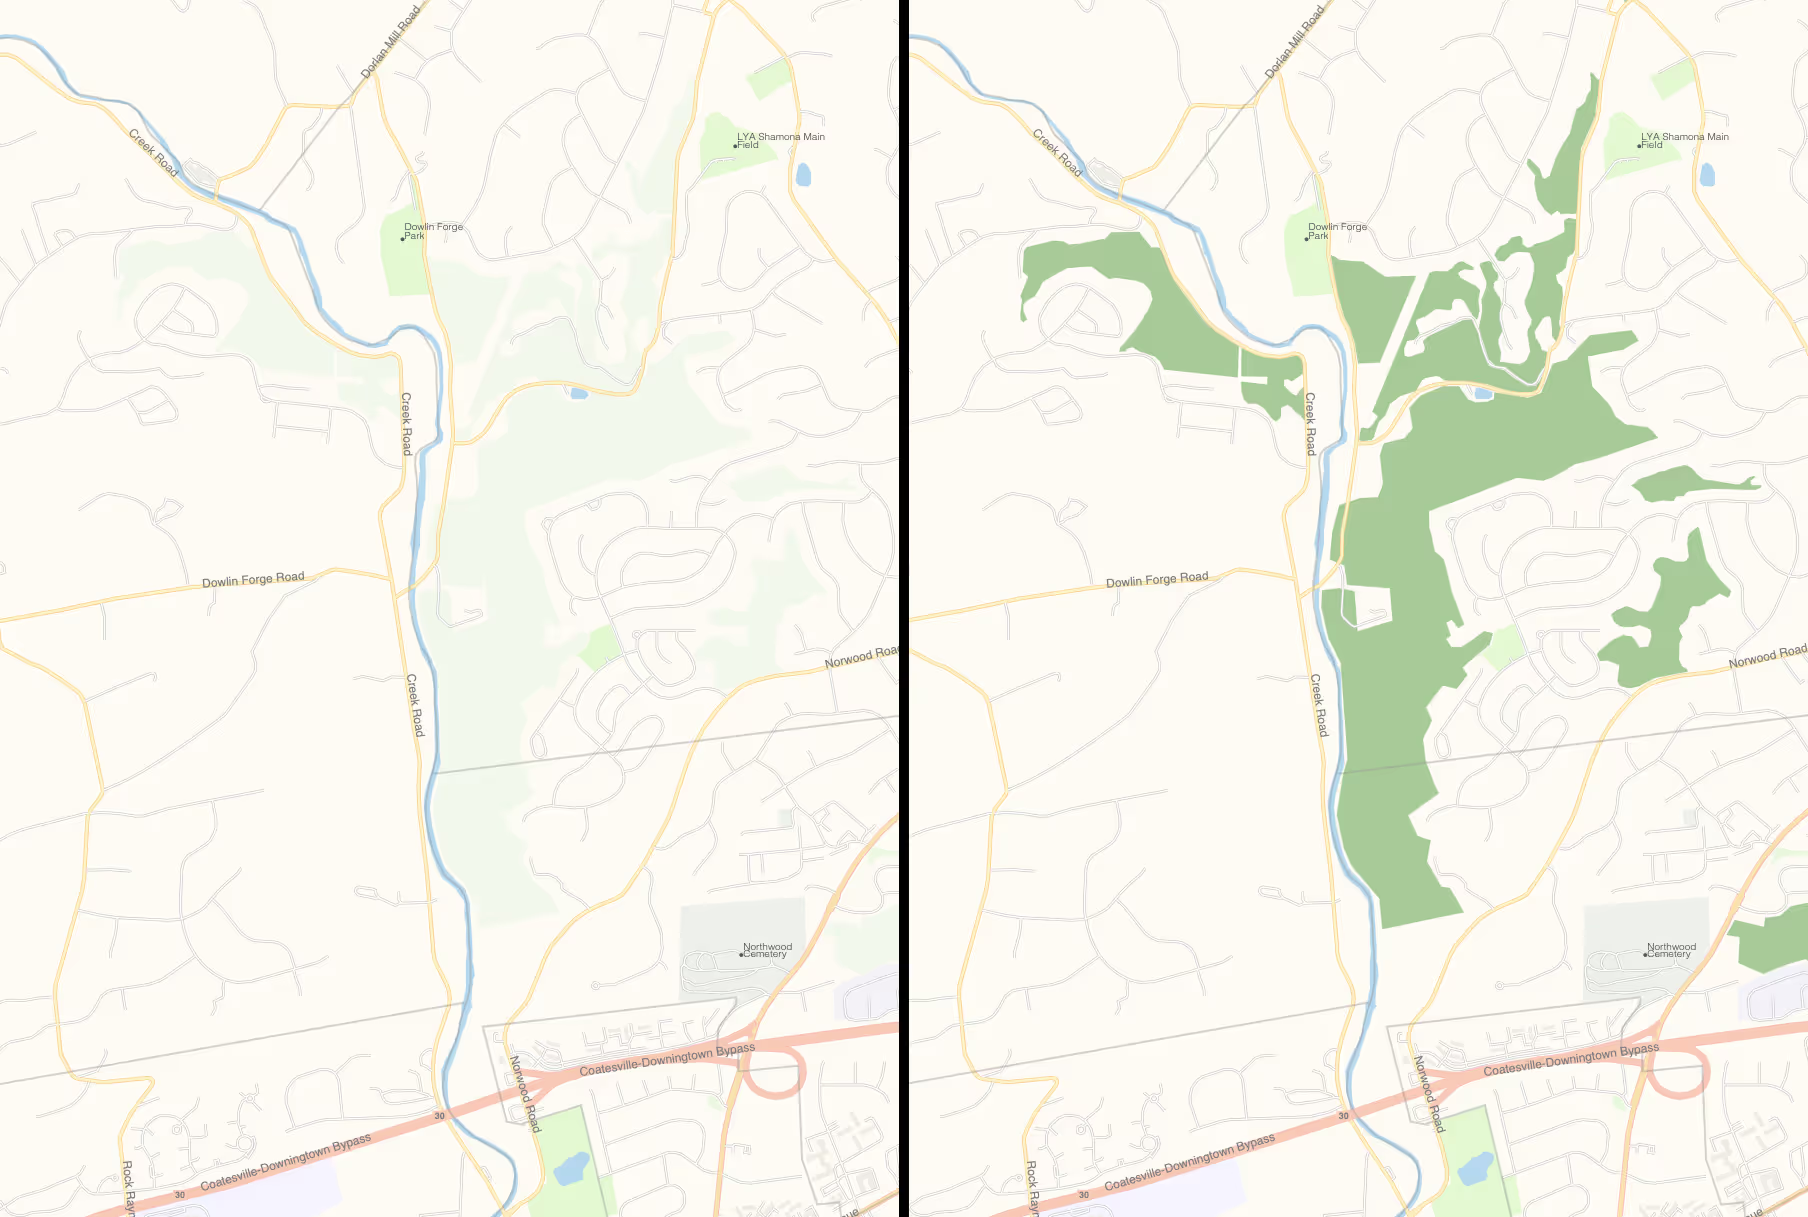
Darker Woods: Playing With Existing Colours
I do not like how woods are currently being rendered in a light faded green. I can barely tell whether it is there. For running, I often prefer to aim for wooded areas, so this will not do. In this changing of the style, it is actually possible to just change the light theme configuration prior to creating the actual paint and label rules.
For that, consider what the light_theme (protomapsL.light) variable
actually represents.
{
    boundaries: "#9e9e9e",
    buildings: "#F2EDE8",
    cemetery: "#EFF2EE",
    cityLabel: "#6C6C6C",
    // ...
    // skipped a bunch of lines
    // ...
    wood: "#F4F9EF",
}
So it is just a bunch of keys tied to an RGB colour value. Those colours then
get passed to the paintRules and labelRules functions that turn them into
actual rules. In other words, just change a colour prior to those function
calls and you should see the effects. Tinkering with these values might already
cover your use case.
For my darker woods, I lightly modify the earlier piece of code.
let light_theme = protomapsL.light;
// Override the `wood` value
light_theme.wood = "#ADD19F";
let my_paint_rules = protomapsL.paintRules(light_theme, "");
let my_label_rules = protomapsL.labelRules(light_theme, "");
And this is the result, before on the left, after on the right.
Colour Forests: Adding a Single Rule From Scratch
Changing the colour made me notice an omission. Areas tagged as natural=wood
in OpenStreetMap are now rendered a satisfying dark green. However, areas
tagged landuse=forest are not even showing up. Dropping the .pmtiles file
into the PMTiles Viewer shows me these areas are
included though. Specifically, the natural layer in the pmtiles file has a
polygon with a landuse=forest tag.
Now, natural=wood vs landuse=forest is a bit of a contentious topic in
OSM. For the purpose of this map however, I just want to also
render landuse=forest in the same manner as the natural=wood areas. Since
Protomaps’ default style currently does not take them into account, I instead
have to add an extra paint rule to handle it.
To understand what is happening, you might want to take a look into the
my_paint_rules we created earlier. You will find it is an array of objects,
each a painting rule. Each object (i.e., each rule) has three properties.
dataLayer is a string and it specifies a name. The name matches a layer name
in the pmtiles file. This rule only applies to features in that layer.
symbolizer is another object. The protomaps-leaflet library provides some
classes for these symbolizers, so you can instantiate one while passing the
proper configuration along. filter is a predicate function. This property is
optional. The function can expect two parameters: zoom (i.e., the current
zoom level) and feature (i.e., the point, line, or area that may want
styling). If the function returns true, then the rule is applied to this
feature at this zoom level.
Thus, further modifying the earlier piece of code gives the following. Here I
make use of the built-in PolygonSymbolizer since I want to render a polygon.
I pass along the wood colour I overrode earlier to get the same colour as the
other woods. Note when filtering I need to access the props property of
the feature in order to find the tags from the .pmtiles file.
let light_theme = protomapsL.light;
light_theme.wood = "#ADD19F";
let my_paint_rules = protomapsL.paintRules(light_theme, "");
let my_label_rules = protomapsL.labelRules(light_theme, "");

// Create the rule
let forest_rule = {
  // landuse=forest areas exist in this layer in default .pmtiles format
  dataLayer: "natural",
  symbolizer: new protomapsL.PolygonSymbolizer({
    fill: light_theme.wood,
  }),
  filter: (zoom, feature) => {
    // zoom does not matter to me here
    return feature.props.landuse === "forest";
  },
};
// Add it to the end of the array of rules
my_paint_rules.push(forest_rule);
There is also a LineSymbolizer class. Perhaps others I have not needed to use
yet.
Note I am adding the rule to the end of the array of rules. The order here matters. Rendering goes through the rules one by one, starting at index 0. Application of a rule will paint over earlier rules. This works out in my simple example. For a production setup, you will probably want to give some thought to where to actually add a rule.
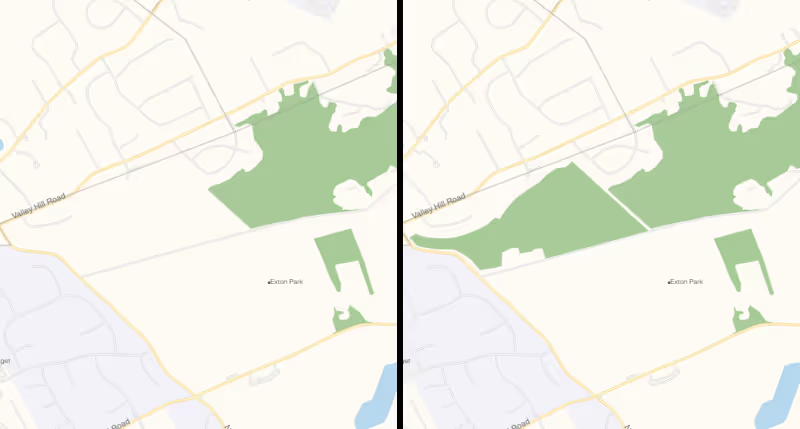
Finally, here is a before and after picture again. The area that was already green is a natural=wood area. The new area is a landuse=forest area.
Delving Further
Writing a Style From Scratch
A situation where it would prove useful to make a style from scratch is when
you have a .pmtiles file that does not just contain the usual OpenStreetMap
map data. Indeed, you can throw just about any geo data in these files. I have
not done a styling from scratch yet, but do have some custom pmtiles files
lying around, so will probably get around to it soon-ish. Watch this space. My
gut feeling is that you just define paint rules like before, but then without
building on an existing array of rules.
Label Rules
I have not yet played around with the label rules at all. Doing so will likely involve some digging into the repository. You can use the following file as a starting point, it is where the default rules get defined. You can also use that file as a continuation point for digging into more paint rules.
src/default/style.ts at github.com/protomaps/protomaps-leaflet
Summary
Styling your .pmtiles data seems simple enough (once I figured it out from
digging into their code, that is… still not overjoyed with the documentation),
at least in straightforward cases. I am sure things can get complicated
quickly. Either way, I wanted to get this post out there so I can dig into
playing with custom data. That would involve styling anyway, so I wanted to
have something to refer back to.

